SUPIR Online Ultimate Image Upscaler by Official Developers Full Tutorial SUPIR 2 Incoming
Full tutorial link > https://www.youtube.com/watch?v=JajPVWMt2Lk


Full tutorial for The Leading-Edge AI Tool for Superior Image Enhancement and Upscaling SUPIR Online via Suppixel AI. It is developed and published by the official authors of open source SUPIR upscaler (Scaling Up to Excellence: Practicing Model Scaling for Photo-Realistic Image Restoration In the Wild). You don't need a GPU or setup to use SUPIR online.
🔗 SUPIR Online Instructions Post (public no need login)
🔗 SUPIR Offline Open Source Local APP Tutorial - Free
🔗 How to Register and Use SUPIR Online
🔗 After registering and putting some credits you start using SUPIR online in at this URL
🔗All your generations will be saved and accessible at this url
00:00:00 Introduction to SUPIR online ultimate upscaler
00:01:08 How to register SUPIR online and start using it
00:01:30 How to set SUPIR online upscale parameters and what each one does
00:01:56 Upscaling 330x277 pixel image to 4x and then 3x more
00:02:17 How to generate best possible image description for upscaling for free via Claude 3.5 Sonnet
00:02:52 Where to and how to look testing results of all possible upscale parameters and options
00:03:29 How to remove unwanted backgrounds with the most advanced BiRefNet open source background remover - useful to get transparent background after upscale
00:05:10 imgsli comparisons to see effect of each option on SUPIR online such as texture and creativity
00:06:45 Two times upscale strategy impact and difference
00:07:32 Best settings and also old photo option impact and effect
00:08:30 Where to find upscaled images history and download and delete them
00:09:07 How to use this amazing upscaler locally for free on your PC or on cloud services
Achieve Flawless Prints with SupPixel AI
Enhance the print quality of your photos with SupPixel's Image Enhancement and Upscaler. With just one click, effortlessly enlarge your images while optimizing their quality to remain clear and detailed. Elevate your print quality to the next level!
All-in-One Solution
SUPIR model to solve all your image enhancement and upscaling needs! Whether your images are compressed, noisy, or blurry, our model delivers astonishing results beyond your imagination.
Cutting-Edge AI Technology
Experience the most advanced image processing and AI model available today. You are not just using a convenient tool, but the pinnacle of technological innovation!
FAQS
How fast is the image processing?
Depending on the output image size, the processing time will vary, ranging from a few seconds to two minutes. Although we have deployed the most advanced AI servers, the calculations required for powerful AI technology are also huge. We are doing research to optimize the processing time.
Do I need to keep the browser open after I start processing?
No, if you are already logged in, you can safely close the browser. Once the task is submitted, it will continue processing, and you will not lose any progress. You can view your processing results later on the history page.
Can I use SupPixel AI for my business?
Certainly! SupPixel AI is suitable for various business needs, including those of Instagram, Facebook, Twitter, and Pinterest bloggers, website owners, designers, photographers, self-development coaches, students, managers, and more. Our tools significantly enhance the visual impact of presentations, advertisements, websites, and social media posts.
Is SupPixel AI free? What are the subscription plans for SupPixel AI?
SupPixel AI offers three subscription plans: Starter, Basic, and Pro. Due to the high computational costs, we currently cannot offer a free trial. However, for just $5, you can explore our top-tier image processing models with the Starter plan, which provides 100 credits. For users needing more credits, the Basic plan offers 2000 credits per month at $39. The Pro plan is designed for professional users who require a higher number of credits.
What does credit mean in SupPixel AI?
In SupPixel AI, service usage is measured in units of credits. Credit consumption is calculated based on the original image's pixel count and the upscale factor, ensuring fair usage. For example, processing a 1080p Full HD image typically costs 2 to 4 credits, while a 4K image costs around 15 to 20 credits. The formula for calculating credits is: (cost per AI computation) x (input image pixel count) x (upscaler factor)^2 / 1024^2.
How is SupPixel AI priced?
SupPixel AI utilizes the most advanced AI models, providing unique processing effects that require significant computing resources. Consequently, the pricing of SupPixel AI is primarily determined by the cost of computation.
#supir #upscale #magnific #stablediffusion #workflowoptimization
-
00:00:00 Greetings everyone. Today I am going to introduce you the SUPIR online by the SUPIR original
-
00:00:06 developers. If you had watched my previous tutorials, you will know by now that the SUPIR
-
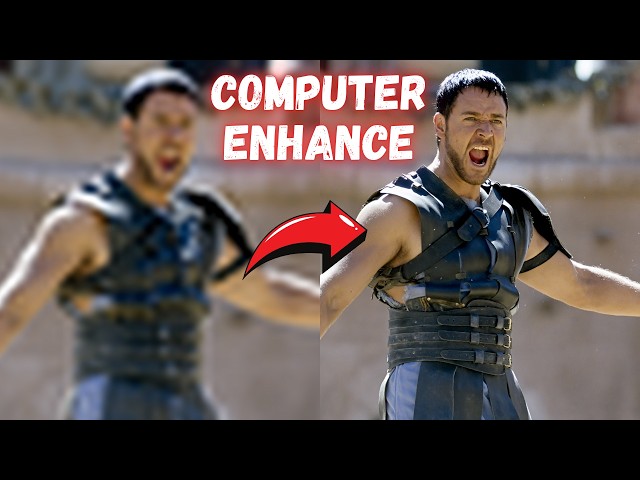
00:00:14 is the ultimate upscaler that no one can compete with. Both in the paid upscalers or in the open
-
00:00:23 source upscalers, from this image to this image is possible with SUPIR. It is just mind-blowing,
-
00:00:30 and now the original authors, the developers of the SUPIR, started an online website where
-
00:00:37 you can use the SUPIR online on cloud without having any GPU. It is currently a paid service,
-
00:00:45 but they contacted me and told me that they are going to use the funds they generated on
-
00:00:51 this service to develop SUPIR version 2 and most awaited SUPIR video. So I have prepared an amazing
-
00:00:59 public Patreon article. The link will be in the description of the video. This is a public post;
-
00:01:04 you don't need to be my Patreon member or you don't need to register Patreon. The link of
-
00:01:09 SUPIR online is here. Just click this link to go to the website. You need to register and also set
-
00:01:16 up some billing. Then you will be able to start using it. For using it, we have workbench here.
-
00:01:22 The link is here. The interface is very simple. You just upload your image which one you want to
-
00:01:28 upscale. For example, this is the original image that I have used. You set the upscale factor from
-
00:01:34 here. Since this is a very low resolution image, I am going to first upscale it. Then I am going to
-
00:01:39 continue upscaling the original upscaled image. There are sampler, lighting, balance, ultimate
-
00:01:46 perception, prioritizing, fidelity, quality. I have tested all of this, but by default settings it is
-
00:01:52 working pretty good as well. So this image is originally 330 pixels to 277 pixels. Therefore,
-
00:02:00 I have upscaled it to 4x first with ultimate perception, the best quality, and the fidelity
-
00:02:06 option here because I want the best resemblance to the original image with texture richness 1 and
-
00:02:12 creativity 0. You also need to describe an image description. For image description, I have used
-
00:02:20 the Claude 3.5. It is free on poe.com. The link is here. Just upload your image and
-
00:02:28 you can use this simple prompt: "Caption this image in details," and the Claude will provide
-
00:02:33 you a description for your image. The testing prompts are shown here. So let's copy this,
-
00:02:40 paste image description here and create, and it will upscale image for you. You don't need a GPU
-
00:02:46 for this. So I already have done a huge amount of testing for this creature and this real image. The
-
00:02:53 test results are posted on HuggingFace as a zip file. You can download from here and here. The
-
00:02:58 zip files links are in the post. So what is inside this zip file? Inside this zip file, you will find
-
00:03:04 all the generated images with their configuration. So what does this configuration mean? For example,
-
00:03:11 let's open this image, and this image turned that tiny image into this amazing image. You
-
00:03:18 will notice that there will be some hallucinations like this. You can easily delete them and then you
-
00:03:24 can remove the background. Let's also do this. For example, let's save this like this. Then for
-
00:03:30 removing the background, we also have an amazing new state-of-the-art background remover BiRefNet.
-
00:03:36 Just click here. So you can download and use this background remover, or you can use any background
-
00:03:42 remover as well. Let me start BiRefNet and show you how it is going to remove the background, but this
-
00:03:49 is a very simple background so you can remove it with any software. Currently, it doesn't support
-
00:03:53 upscaling without any background. So let's remove the background of this image. Let's just drag and
-
00:04:00 drop this and we just need to do single image process. It is going to remove the background
-
00:04:05 with maximum best possible quality, but since this is a simple image, you can use your tool to remove
-
00:04:12 background. You can even use the Paint.NET like this. However, using such state-of-the-art AI
-
00:04:19 model may yield better borders and results. This is also super fast background remover. Since we
-
00:04:26 are first time running it, it is loading the model. Then and also since this image is huge,
-
00:04:31 it is going to take more time than usual. So what is the resolution of this image? This image
-
00:04:36 resolution is 3960 pixels to 3324 pixels from 330 pixels to 277 pixels. So this is the difference of
-
00:04:47 upscale with SUPIR model. It is just mind-blowing and the background removed image is generated. So
-
00:04:55 this is how this state-of-the-art model removes the background. If you own Photoshop, you can of
-
00:05:01 course use Photoshop, but this model is able to remove such harder backgrounds as well. Anyway,
-
00:05:06 this is not the case of this tutorial. So I also have imgslis. Let's go to them. They are
-
00:05:12 also in this post. So this post that I will share on the description is very important.
-
00:05:17 You will find almost all of the options here. So you can compare like the effect of creativity.
-
00:05:23 For example, let's select the ultimate fidelity standard texture 1 and let's select the ultimate
-
00:05:29 fidelity standard texture 1 and creativity 1. With this way, you can compare the effect and impact of
-
00:05:37 each feature on the SUPIR online website. So this will help you significantly to see the
-
00:05:45 difference of each option. I uploaded both the real image and also this creature image. So you
-
00:05:52 can see the impact of each option on each type of image. For example, let's look at the texture 3
-
00:05:59 and creativity 3 difference. You can see how much difference it makes. The texture 3 and creativity
-
00:06:06 3 adds a lot of more details. Of course, there will be some new features like this. So what
-
00:06:12 you can do, you can reduce the creativity and go with higher texture. It will add lesser amount
-
00:06:17 of details but it will reduce the hallucinations as well. Let's go with the texture 8 for example.
-
00:06:24 Okay, the texture 8 is adding a lot of details as you can see. This part is not important. You can
-
00:06:30 remove them easily. I didn't remove so you can see how much details it adds. Let's compare with
-
00:06:35 the original. So the left one was the original beginning image and the right one is the final
-
00:06:41 image we get. It is just mind-blowing as you are seeing. This was a 2 times upscale. For some
-
00:06:47 images, making 2 times upscale may be better, but for this real image I didn't find it better.
-
00:06:52 For example, I downscaled the original image then I upscaled it twice. The first upscale yielded
-
00:06:59 this image, then the second time upscale yielded this image. So for this real image, 2 times
-
00:07:07 upscale didn't work as expected, but going from original to the 3 times upscale yielded the
-
00:07:14 best results. However, for this creature, first I have upscaled it to 4 times like this from this
-
00:07:21 left original to the 4 times upscale with maximum fidelity being loyal to the original
-
00:07:28 image. Then I used this base image to upscale it 3 times more. So you just upload your image,
-
00:07:35 set the description, set the sampler. Ultimate is best. Set the prioritizing for such images like
-
00:07:41 creature. The quality works better. Fidelity may work better for real images. Photo type standard
-
00:07:48 and old photo. When you pick the old photo, if it is not an old photo, it will break the image.
-
00:07:55 Let me show you. So you will see that since this image is not an old photo, it breaks the
-
00:08:00 image like this. So use the standard. Texture richness adds texture details and creativity
-
00:08:07 adds new features that doesn't exist. So it is pretty simple. Select the ultimate perception,
-
00:08:13 select the fidelity for real images, select the quality for images like this, use standard photo,
-
00:08:19 add more texture richness for such images like creature, or for real images you may
-
00:08:25 want to reduce. You can also add creativity and make a good description of the image. Then when
-
00:08:31 you go to the history, you will see all of your upscales. You can download them. You can see them.
-
00:08:38 You can download them by clicking the image and click download. So entire history of you will be
-
00:08:43 shown here. The authors messaged me as I said and they are going to improve the interface,
-
00:08:49 the speed and everything. So if you also want to see a more advanced SUPIR model like me,
-
00:08:55 give a support to these guys. These guys are amazing. They published the SUPIR
-
00:09:00 for free for us. So that is why I have recorded this video as a gratitude of myself to them.
-
00:09:07 Still, if you want to use this amazing model locally, I have a full tutorial. The link is
-
00:09:12 here. Just go to this link. So this is the tutorial and in the description you will find
-
00:09:18 all of the video chapters. If you want to use this model locally or like on a private cloud service,
-
00:09:24 you can follow this tutorial. However, if you don't want to spend time to set up anything
-
00:09:30 and have better and faster results, you can use the Subpixel AI. This is the official release
-
00:09:38 of the official developers. So I hope you have enjoyed and pay attention to the imgsli to
-
00:09:44 see every kind of combination and see which option makes which impact. So read this description very
-
00:09:51 carefully, read this page very carefully and you will know what each option does and you will find
-
00:09:57 all of the links that you need. Hopefully see you in another amazing tutorial video.