Hi3DGen Full Tutorial With Ultra Advanced App to Generate the Very Best 3D Meshes from Static Images
Hi3DGen Full Tutorial With Ultra Advanced App to Generate the Very Best 3D Meshes from Static Images
Full tutorial link > https://www.youtube.com/watch?v=HjbD20B2C1g
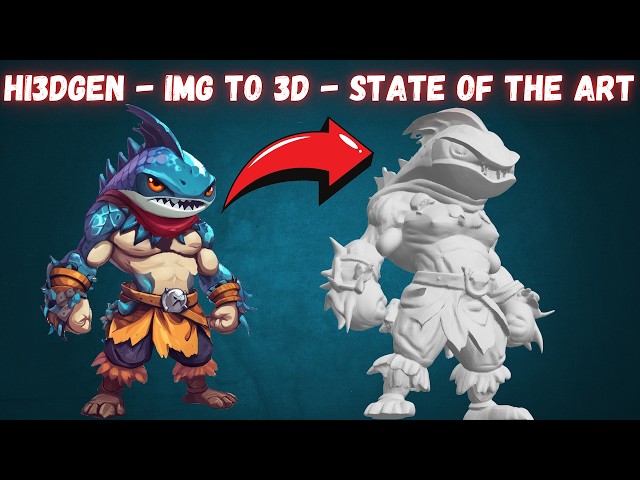


Hi3DGen is the newest state of the art image to 3D mesh generation model. In this tutorial I will show you step by step how to install and use this amazing open source AI model to generate the very best 3D meshes from static images and use in your projects.
🔗Follow below link to download the zip file that contains App installer - the one used in the tutorial
🔗 Requirements - Python, Git, CUDA, C++, FFMPEG, MSVC installation tutorial
🔗 SECourses Official Discord 10500+ Members
🔗 Stable Diffusion, FLUX, Generative AI Tutorials and Resources GitHub
🔗 SECourses Official Reddit - Stay Subscribed To Learn All The News and More
🔗 SUPIR Image Upscaling App Tutorial for Upscaling Images With Really Adding New Details
DetailVerse: The Fuel for High-Fidelity
High-quality models require high-quality data. The researchers found that existing 3D datasets like Objaverse, while large, are dominated by objects with simple geometry and plain surfaces. Training on such data inherently limits a model's ability to generate complex details.
To solve this, they built DetailVerse, a massive synthetic dataset of 700,000 high-quality 3D assets specifically designed to be rich in geometric complexity. The creation pipeline is a feat of engineering in itself:
Text Prompt Curation: Starting with 14 million text prompts, they used LLMs to filter, classify, and standardize them to describe diverse, single-objects with clear geometric attributes.
High-Quality Image Generation: The state-of-the-art text-to-image model Flux.1-Dev was used to generate images from these prompts, with specific instructions for isometric views and high detail.
Robust 3D Synthesis: The powerful image-to-3D model Trellis was used to convert these images into 3D meshes.
Rigorous Quality Control: The resulting 3D assets underwent a strict filtering process, using both automated checks (a DINOv2-based quality classifier) and human expert evaluation to ensure only the highest-quality, artifact-free models made it into the final DetailVerse dataset.
Results: Setting a New State of the Art
Hi3DGen's performance was rigorously evaluated, and the results speak for themselves.
Qualitative Superiority: As seen in numerous visual comparisons, Hi3DGen consistently generates 3D models with superior detail and fidelity to the input image. It excels at capturing complex textures, sharp edges, and subtle surface variations that other models miss entirely.
Quantitative Dominance: In quantitative benchmarks for normal estimation, NiRNE significantly outperforms both regression-based and diffusion-based methods on key metrics like Normal Error (NE) and Sharp Normal Error (SNE).
User-Approved: In a user study involving both amateur 3D users and professional 3D artists, Hi3DGen's results were overwhelmingly preferred over five other leading models, including Hunyuan3D-2.0, Dora, Clay, Tripo-2.5, and Trellis.
Hi3DGen represents a significant leap forward in single-image 3D generation. By rejecting the direct 2D-to-3D approach and instead adopting a "normal bridging" strategy, the framework effectively decomposes a complex problem into solvable parts. The combination of a specialized normal estimator (NiRNE), a regularized geometry generator (NoRLD), and a purpose-built, detail-rich dataset (DetailVerse) creates a synergistic system that achieves unprecedented fidelity.
Video Chapters
00:00:00 Introducing Hi3DGen: State-of-the-Art Image-to-3D Model
00:00:34 Advanced Gradio App Features & One-Click Installation
00:01:17 In-Depth App UI Features: Presets & 3D Result Analysis
00:02:14 How to Download & Install Hi3DGen App on Windows
00:02:55 Starting the Fully Automatic Windows Installation Process
00:03:38 Pro Tip: Upscale Input Images with SUPIR for Best Quality
00:04:25 App Parameter Guide and Batch Processing Folder Setup
00:05:12 How to Install and Use on Cloud GPUs (RunPod & Massed Compute)
00:05:46 Installation Complete & How to Resume Failed Model Downloads
00:06:11 Starting The App & Running Your First 3D Generation
00:06:54 Understanding the Generation Process & The Slow xatlas Step
00:08:04 Analyzing The First Generated 3D Mesh in The UI
00:08:26 Locating & Checking The Automatically Saved 3D Files (OBJ, GLB, STL)
00:08:54 How to Set Up & Start Batch Processing Multiple Images
00:09:39 Monitoring Batch Progress & Using The Cancel Feature
00:10:15 Detailed Step-by-Step Guide for RunPod Installation
00:10:55 Detailed Step-by-Step Guide for Massed Compute Installation
00:11:41 Teaser: Ultimate Video Upscaling App Coming Soon
Some background music by NoCopyrightSounds : https://gist.github.com/FurkanGozukara/681667e5d7051b073f2e795794c46170
-
00:00:00 Greetings everyone. Today I am going to introduce you to Hi3DGen. This is
-
00:00:05 the state-of-the-art image-to-3D mesh generation model. By state-of-the-art,
-
00:00:11 I don't exaggerate. As you can see here, Hi3DGen is performing better than Hunyuan-3D 2.0, Clay,
-
00:00:22 and Trellis. They have made an interactive website where you can compare results,
-
00:00:28 as you are seeing right now. So truly, this model is the very best right now.
-
00:00:34 And for this model, I have developed a very advanced Gradio application,
-
00:00:40 one-click to install on Windows, on RunPod, and on Massed Compute. So if you don't have
-
00:00:46 a very powerful GPU, you can run this on the cloud, but it is not very demanding,
-
00:00:51 so it should work on most of the newer GPUs. The application I have developed is extremely
-
00:00:58 advanced, and it has all the features that you would need, like batch processing,
-
00:01:02 parameter guide, being able to set all of the parameters, automatically saving OBJ files,
-
00:01:10 GLB files, STL files, and PLY files. It allows you to quickly analyze the result
-
00:01:17 like this. It allows you to change between point cloud to see it how it is, or wireframe
-
00:01:23 like this. So you can see the output, analyze it on this interface without anything else.
-
00:01:29 Moreover, it allows you to set up your preset. When you one-click install it,
-
00:01:34 it will show you default and high-quality preset,
-
00:01:36 but you can set your preset as you wish. There are also some examples that you can set.
-
00:01:42 It also has a cancel feature for batch processing. So whatever you may need to use this application,
-
00:01:49 this application has all of it. I have spent huge time to develop this application. Moreover, this
-
00:01:54 application utilizes the CPU offloading and flash attention so that you will get amazing results.
-
00:02:02 And as we can see that they are really, truly generating the amazing results as they claim.
-
00:02:08 So this is currently state-of-the-art image-to-3D mesh generation model.
-
00:02:14 So how you can download and install this application on your Windows computer? The link of
-
00:02:19 this page will be in the description of the video, so download the latest zip file. Before starting
-
00:02:24 installation, make sure that you have followed our requirements tutorial. This is mandatory, but
-
00:02:30 this is mandatory only for one time. After that, you will be able to use all of the applications
-
00:02:37 that I have developed. And we have a massive amount of applications on our Patreon page.
-
00:02:42 So after downloading this zip file, move it into any disk where you want to install. For example,
-
00:02:48 let's install into our Q drive. Right-click, extract all, extract here. Then all you need to
-
00:02:55 do is just double-click windows_install.bat file, more info, run anyway. And it will automatically
-
00:03:02 start the installation. It will generate a virtual environment folder and install
-
00:03:07 all of the necessary libraries into it. So it will be totally isolated. It will not break or
-
00:03:14 modify any other applications that you have on your computer. You can follow the entire
-
00:03:19 status of installation here. I have pre-compiled the libraries for you, so this application works
-
00:03:25 on RTX 5000 series as well, as well as RTX 4000 series, 3000 series. I didn't test on
-
00:03:32 2000 and 1000 series. It should work, but it is working starting from 3000 series to 5000 series.
-
00:03:38 Moreover, you see that this image is really high quality, or this image compared to what they
-
00:03:43 provide on their website. I have used our SUPIR application. It is also one-click to install,
-
00:03:49 and you see the difference of upscaling these images. The model works best with 1024-pixel
-
00:03:57 images. So you can upscale your 3D images first, then use. And it will improve your results. It
-
00:04:04 will improve the quality of your application. And you see this is the quality improvement of
-
00:04:09 the SUPIR application that we have. It is just mind-blowingly amazing. This is the really,
-
00:04:14 really very best image upscaling application still. It also has so many features. We also
-
00:04:21 have a tutorial for this, so if you need it, just reply me, and I will give you the link.
-
00:04:25 Since we have too many options here, if you want to learn what they do, you can go to
-
00:04:30 parameter guide and read all of the details, learn whichever the parameter function, what they do,
-
00:04:38 and change your settings accordingly. After doing a few tests, you will find the very best settings
-
00:04:44 for your workflow. Moreover, when you give the input folder path and output folder path, it
-
00:04:50 will process all of the images inside that folder and generate the meshes, which I am going to show
-
00:04:56 you. The installation is still continuing. It is fully automatic. You don't need to do anything. It
-
00:05:01 will also download the model files as well into the accurate folders for you, fully automatic.
-
00:05:07 So what about if you want to install on RunPod and Massed Compute? It is so easy. I recommend Massed
-
00:05:12 Compute. Just open the Massed Compute instructions TXT file and follow the instructions here. If you
-
00:05:18 don't know how to use Massed Compute, we have an example tutorial here. For RunPod, again, just
-
00:05:23 open the RunPod instructions TXT file and follow the instructions here. They are all one-click
-
00:05:29 to install. If you don't know how to use RunPod, just follow this tutorial, and you will learn how
-
00:05:34 to use it. You see our installation is continuing. Now it is downloading the models automatically for
-
00:05:39 us with the maximum speed because everything I do is fully optimized for maximum efficiency always.
-
00:05:46 All right, so the installation has been completed, and all of the models have been downloaded. You
-
00:05:51 can see that download completed, press any key to continue. You can scroll up and see
-
00:05:56 if there are any errors or not. You shouldn't have any errors, and it is done. If you get
-
00:06:01 errors during model download, you can click windows_resume_model_download.bat file, and
-
00:06:06 it will resume and fix your download, hopefully. After that, to start the application, just click
-
00:06:11 windows_start.bat file, more info, run anyway. And it will start the application. During the start,
-
00:06:18 it will verify downloaded files and load them one by one. You see it is verifying all of the
-
00:06:23 downloaded files. So the application started. It will be automatically opened like this. I
-
00:06:28 recommend you to first test an image from here. So let's select this as an example. You see the
-
00:06:35 default config is set, and generate 3D mesh. Then follow what is happening on the CMD window. You
-
00:06:43 can see the messages here, and it will start the generation right away almost because the models
-
00:06:48 are not that too big. You will see the progress like this. There is one progress step that
-
00:06:54 takes too much time, which is xatlas generate. Unfortunately, we are not able to see the progress
-
00:07:01 here because this is a third-party library, and there is no way to get progress, the percentage.
-
00:07:07 So you just need to wait here patiently until it is completed. And it is showing us that input mesh
-
00:07:14 vertices count, faces count. This model is really, really the state of the art right now among the
-
00:07:19 open-source models. There is no other better model than this one, and they also show it on their
-
00:07:26 project website. You can also see the progress here. You see it is showing the progress. It
-
00:07:31 is not taking very long, but this part, starting xatlas generate, is taking a lot. So therefore,
-
00:07:37 you can even use 50 sampling steps. These values are based on the default values that the original
-
00:07:43 developers has been suggested, but of course, you can play with this and see if you are getting
-
00:07:49 better results than these ones. This part may take a lot, so you just need to wait. Okay, it has been
-
00:07:56 completed. So that part took like 90 seconds, and this is the generated 3D mesh. So from here, you
-
00:08:04 can change the view to see it. This is like point cloud. This is wireframe. You can zoom in to see
-
00:08:11 the vertices, the points. And are they saved? Yes. Since we are automatically saving these formats,
-
00:08:18 I can just open the open outputs folder, which is just the outputs folder inside the Hi3DGen folder.
-
00:08:26 So this was the first generation, and you can see all the files here. The generated GLB file,
-
00:08:32 OBJ file, PLY file, and STL file, the info of the generation, the normal map,
-
00:08:40 and the material MTL file. So everything is saved. You can also download them from here. You see,
-
00:08:47 OBJ download 3D mesh, and it will download as you are seeing right now. So these are the features.
-
00:08:54 For batch processing, all you need to do is just give the folder path. So, for example,
-
00:09:01 let's enter inside the examples here, inside assets, inside example images, this folder.
-
00:09:06 Then I need to give a folder where I want to save them. So for example, let's save them inside this
-
00:09:14 folder. So I will just copy path of it, paste it, then I will say start batch processing,
-
00:09:20 and it will start the batch processing. You can follow everything here, what is happening here. It
-
00:09:26 shows that there are 33 images, and it will start processing each one individually. And we will
-
00:09:33 see them; they will be get saved here with the same file name folders. We will see in a moment.
-
00:09:39 Okay, so the first processing has been completed. We can see that it generated
-
00:09:43 folder zero. Why? Because the file name is 0.png. When I enter inside it, I will see the OBJ file,
-
00:09:52 the other files, and this generated file. The second one has been also completed like this.
-
00:09:58 So it will process everything like this. You can also cancel the process from by clicking cancel.
-
00:10:05 It will cancel whenever it is available. It cannot cancel immediately, so just wait patiently. So
-
00:10:10 this is everything about this application. It is extremely useful if you are working with 3D.
-
00:10:15 And what about using on RunPod and Massed Compute if you don't have a powerful GPU? Just open the
-
00:10:21 RunPod instructions TXT file. Please use this link to register. Then select this PyTorch file,
-
00:10:28 upload files into the workspace, extract, then execute this command. Wait for installation to
-
00:10:34 be completed. It takes a lot of time on RunPod, but it will install and download everything.
-
00:10:39 Then just use this command, and it will start a Gradio live share Gradio interface which you
-
00:10:45 will be able to use. Then you can download from the interface like we have downloaded from here,
-
00:10:51 like this download OBJ, or you can download the outputs folder directly.
-
00:10:55 For Massed Compute, just open the Massed Compute instructions TXT file. Please use this link to
-
00:11:02 register, I appreciate that. Then select SECourses image, apply our coupon. Now our coupon
-
00:11:08 works on all of the GPUs, and you can see the prices here. Let me show you. This is a public
-
00:11:14 article, and you can see the comparative prices between RunPod and Massed Compute, and Massed
-
00:11:20 Compute speed is way better, installation speed. Then upload the files onto the Massed Compute,
-
00:11:27 extract, then use this command, and then once the installation has been completed,
-
00:11:32 use this command. If you don't know how to do them, follow this tutorial and also
-
00:11:36 follow this tutorial. They show that. You can always ask me any questions that you want.
-
00:11:41 And before I end this tutorial, currently I am actually working on ultimate video processing
-
00:11:48 application. This will be hopefully many times better than, I say better, better quality than
-
00:11:54 the Topaz AI latest model. How? Because this application is based on STAR model. It's a
-
00:12:01 diffusion-based model, and it supports prompts. So therefore, with accurate prompting, you really
-
00:12:09 add new details. What kind of new details? The new details like the SUPIR application
-
00:12:15 adds. You see the SUPIR application adds new details because it is diffusion-based model,
-
00:12:20 and STAR model is exactly same. With STAR model, we will be adding new details. I have improved
-
00:12:26 the interface significantly. We have so many features like scene split, output comparison,
-
00:12:33 batch upscaling, FPS increase, so many features. I am trying to add everything into this application.
-
00:12:39 Hopefully, it will be published soon. So stay subscribed, and hopefully see you later.
-
00:12:44 By the way, the Bronze subscription price will be increased before publishing this application. So
-
00:12:50 subscribe it right now. The existing subscribers will not be impacted from the price increase
-
00:12:57 forever. So as long as you are subscribed, your price will never change. By the way, I also need
-
00:13:02 to mention that I have forked this repository and developed my app based on that from scratch. So
-
00:13:09 I need to thank them because they have made some improvements. So thank you so much. See you later.