Best Deepfake Open Source App ROPE So Easy To Use Full HD Feceswap DeepFace No GPU Required Cloud
Best Deepfake Open Source App ROPE - So Easy To Use Full HD Feceswap DeepFace, No GPU Required Cloud
Full tutorial link > https://www.youtube.com/watch?v=HLWLSszHwEc
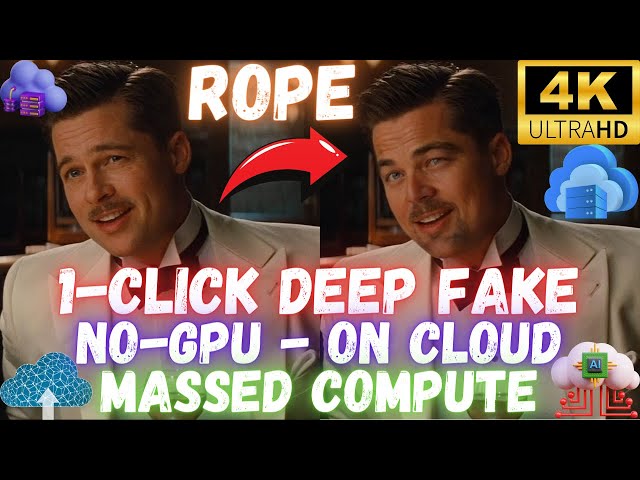


#Rope is the newest 1-Click, most easy to use, most advanced open source Deep Fake application. It has been just published several days ago. In this tutorial I will show you how to use Rope Pearl DeepFake application on a cloud machine with 20 threads ultra fast speeds for very cheap prices. Rope is way better than Roop, #Roop Unleashed and #FaceFusion. It supports multi-face Face Swapping and making amazing DeepFake videos so easily with 1-Click. Select video, select faces and generate your DeepFake 4K ultra-HD video.
So by watching this video, even if you don't have a strong computer, you will be able to use Rope application on Massed Compute cloud machine as exactly as on your computer with staggering 20 threads ultra fast speed for very cheap prices with our special coupon code. This app will run on a remote machine so your machine will be 100% unaffected and safe. But It will be also as easy as using it on your local machine.
1-Click Rope Installers Scripts
https://www.patreon.com/posts/most-advanced-1-105123768
Massed Compute Register and Login
https://vm.massedcompute.com/signup?linkId=lp_034338&sourceId=secourses&tenantId=massed-compute
Rope Pearl Windows and Main How-To-Use Tutorial - NEW
Official Rope GitHub Repository
https://github.com/Hillobar/Rope
Rope's Author Donation Link - Support Him For Better APP
https://www.paypal.com/donate/?hosted_button_id=Y5SB9LSXFGRF2
ThinLinc Client Download
https://www.cendio.com/thinlinc/download/
SECourses Discord Channel to Get Full Support
https://discord.com/servers/software-engineering-courses-secourses-772774097734074388
Why did I choose Massed Compute? Because it is was more stable and cheaper and easier to use than RunPod, Google Colab, Kaggle, Vast AI, Amazon AWS, Azure and all other cloud platforms. After watching this tutorial, you will understand what I mean.
00:00:00 Example Deepfake video from movie Inglourious Basterds 2009
00:00:21 Introduction to Rope application tutorial on cloud machine Massed Compute
00:00:59 How to download Rope installers for Massed Compute and any Linux Ubuntu machine
00:01:42 How to select accurate machine on Massed Compute and apply our coupon SECourses for huge price reduction
00:03:19 How to install and setup ThinLinc client to connect and use Massed Compute machine
00:03:59 How to setup a synchronization folder with ThinLinc client to transfer files between Massed Compute remote cloud machine and your local machine
00:04:51 How to connect initialized Massed Compute cloud machine and start installing Rope Pearl application there
00:05:11 What does End existing session option do
00:05:48 How to see GPU features on remote Massed Compute cloud machine via nvitop
00:05:58 How to start installation script
00:07:45 How to start the Rope application after installation has been completed
00:08:35 How to use Rope Pearl DeepFake and FaceSwap application on Massed Compute
00:11:45 How to select multiple target faces to improve likeliness
00:12:03 Hitting enter after setting a value is mandatory for setting change to be applied
00:12:56 How to save / export DeepFake / FaceSwapping applied new video
00:13:20 Why set 20 threads to get maximum speed
00:13:55 The Rope application real time processing speed when using 20 threads
00:14:50 If you are using Linux on your local computer what you need to install Rope Pearl
00:15:38 Important mistake I made and how you should avoid it
00:16:19 How to DeepFake / FaceSwap only an image not a video
00:16:39 How to see and download rendered / exported / saved new DeepFake / FaceSwapped video
00:17:22 Consider supporting Rope developer via Paypal
00:18:03 Super important thing before terminating your Massed Compute running instance
00:19:10 How to join our Discord channel
Dive into the fascinating world of deepfake technology with this comprehensive guide! In this video, we explore the ins and outs of AI-generated deepfakes, from their creation to their potential impacts on society. Whether you're curious about deepfake tutorials, the latest deepfake software, or the ethical implications of this technology, we've got you covered.
What You'll Learn:
What is a deepfake? Understand the basics of deepfake technology and how it works.
How to make a deepfake: Step-by-step guide using popular deepfake apps and tools.
Detection and protection: Learn about the latest deepfake detection methods and how to protect yourself.
Real-world examples: See deepfake videos featuring celebrities and public figures.
Ethical and legal considerations: Discuss the dangers of deepfakes, their misuse, and the ongoing discussions around regulation.
Why Watch?
Deepfakes are transforming the way we see media, but they come with significant risks. This video will help you understand both the innovative aspects and the potential threats posed by deepfakes, providing you with the knowledge to navigate this evolving landscape safely.
-
00:00:21 So, in this video, I am going to show you how to use this amazing Rope application on Massed
-
00:00:28 Compute with an amazing staggering 20 threads speed very fast very cheap. If you are following
-
00:00:36 my tutorials, I have published the Windows tutorial of this application like two days ago. I
-
00:00:42 have explained a lot of stuff there, so you should watch it, but in this tutorial, I will show you
-
00:00:47 how to install and use this amazing application on Massed Compute. So if you don't have a GPU on your
-
00:00:54 computer, you will be able to use this application with the maximum speed available. So as usual, we
-
00:01:00 will download our installer zip files from here; the link of this post will be in the description
-
00:01:04 of the video. Then let's move it into any folder where we want; let's move it into R drive and
-
00:01:10 extract it into our R drive. You can extract it anywhere; after extraction, enter inside
-
00:01:16 the folder and we have the installer scripts and all the instructions. Let's open the instructions
-
00:01:22 readme file. So this is the readme file. First of all, you need to register the Massed
-
00:01:27 Compute. If you register by using this link, I appreciate that. Also, we have a coupon code,
-
00:01:32 so registering from this link may be more helpful. Once you registered and added your billing details,
-
00:01:39 we are going to go deploy from this menu. Now this is super important; we are going to select
-
00:01:45 RTX A6000 GPU because for this GPU, we have a super special coupon code. From the category,
-
00:01:53 select the creator; from image, select SECourses. Now you see, currently, this is 62 cents per hour,
-
00:02:01 but we are going to apply our coupon like this: SECourses, verify. After you did that,
-
00:02:07 you will get a price of 31 cents per hour. This is super amazing; this is much more cheaper than
-
00:02:14 RunPod and Massed Compute is working many times better than RunPod. After doing this,
-
00:02:19 you can also set multiple GPUs, but I am going to use a single GPU and deploy. Once you deployed, just
-
00:02:24 wait for it to be initialized. I also have this another instance, so I am going to terminate it
-
00:02:29 and just wait the initialization. Moreover, when you are deploying, do not select this RTX A6000
-
00:02:36 alt config; alt config has lesser RAM, you see, 24 gigabytes. Also, our coupon code will not work on
-
00:02:44 that, so RTX A6000 is the very best GPU. With RTX A6000, you will be able to use 20 threads. I am
-
00:02:52 going to show you and it will be super fast. This is the fastest DeepFake, Face Swapping application
-
00:02:59 available on the open source community right now. It will be super fast to change the entire movie,
-
00:03:07 video, or image into a deepfaked, face swapped image. So let's check out the running instance,
-
00:03:14 still initializing. Meanwhile, let me show you how we are going to connect to this machine. To
-
00:03:19 connect this machine, we are going to use ThinLinc client. So type ThinLinc; the link of this will
-
00:03:25 be in the description of the video. So let's go to the ThinLinc from here. If you are using Mac,
-
00:03:31 download Mac; if you are using Linux, download Linux. I am using Windows, so therefore I am
-
00:03:36 going to download Windows. After downloaded, just click it; it will ask you permission,
-
00:03:41 accept by yes, then click next, accept terms and license agreement, install into default folder,
-
00:03:49 and just wait for the install to be completed. Then run the ThinLinc client. In the ThinLinc
-
00:03:54 client, before we start, we are going to set up a synchronization folder. This is super important.
-
00:03:59 If you don't see these advanced settings, click here and then click options. In the options menu,
-
00:04:05 go to the local devices and disable other devices; we don't need them, just enable the drives. Click
-
00:04:11 details. In the details, we are going to add a folder path from our computer which will be
-
00:04:17 synchronized with the remote server. Now I am going to add the path again so you will see. I
-
00:04:22 am going to add a path from my R disk drive; it is named as Massed Compute. Mass Compute. You can add any folder,
-
00:04:30 and just set it. If you want this folder to be only one side, make it read-only, but I want it
-
00:04:36 to be double side, so I will download the files from the remote server as well, so it is read
-
00:04:42 and write. Click OK and click OK. Now just wait for initialization to be completed; the machine
-
00:04:49 is initialized, you see status running. Now we can connect. To connect, click here to copy the login
-
00:04:56 IP, then paste it. You see we just paste the IP, not the HTTP part or the port part. Username is
-
00:05:03 ubuntu and ubuntu and copy the password and paste it, then click connect. Then you will get this
-
00:05:10 message; click connect. You see there is also end existing session option; if you select it, it will
-
00:05:16 restart the machine, so do not select it unless you need it, like the synchronization is broken or
-
00:05:22 something. On this screen, do not wait; just click start, and after a few seconds, you will get to
-
00:05:28 this screen. So this is the machine that we have rented from the Massed Compute. It is running on a
-
00:05:33 cloud remote server, so it is not related to our computer; whatever we do will be running on the
-
00:05:40 remote server. So this server has 48 gigabyte RAM memory and also 48 gigabyte GPU memory.
-
00:05:48 To see the GPU, let's type "nvitop" like this, and it will show us the GPU. You see, we
-
00:05:53 have a 48-gigabyte GPU. Okay, so how are we going to install it? Double-click the home icon here; it
-
00:05:59 will open the home menu. In here, scroll down and go to the Thin Drives. This is the folder where we
-
00:06:05 will see our synchronization folder using Massed Compute. So these files are from my computer. When
-
00:06:11 you get this software updater, just click cancel, and then you see these are the folders from my
-
00:06:18 own computer. So my installer file is not here yet. Let's move the installer files into there.
-
00:06:25 So these are our installers. I am copying it and pasting it into my Massed Compute synchronization
-
00:06:31 folder. After I copy-paste it, just refresh here, and it should arrive here in a moment. You see,
-
00:06:38 it is loading, and yes. Now do not install into the synchronization folder. Where to install? Just
-
00:06:45 drag and drop it into the desktop like this, so it will be moved and copied to the desktop. Yes,
-
00:06:52 it is copied into the right bottom of the screen, so I moved it to here, you see. And you see,
-
00:06:58 all file operations have been completed now. Open the folder, and inside this folder, all you need
-
00:07:05 to do is open "Massed Compute Instructions Read.txt" file. Just copy this installation
-
00:07:12 command with Ctrl+C, then go back to the folder, you see, Home / Desktop / Rope_V4, in here click
-
00:07:21 this three dots icon and open in terminal. Now in this terminal, you see, we are inside Desktop / Rope_V4
-
00:07:28 just right-click and paste and hit enter. You see, I copy-pasted this installation
-
00:07:34 command, and nothing else you need. It will install everything automatically, download all of
-
00:07:40 the models automatically, then we will just start the application after the installation has been
-
00:07:45 completed. So the installation has been completed; it is pretty fast, under five minutes. The Massed
-
00:07:51 Compute is working super fast, you see, virtual environment made and installed properly. So how
-
00:07:57 are we going to start it? Let's enter inside the folder where we have installed. You see, it is
-
00:08:02 installed here. Let's open back the instructions and just copy this, this command, Ctrl+C, return
-
00:08:10 back to the folder, and on this folder, open a new terminal. You see, Desktop / Rope_V4, paste
-
00:08:17 and hit enter, and that's it. This will start the application, and it will be ready to use. Yes,
-
00:08:23 it is started. Now I suggest you watch the Windows tutorial, why because I have explained everything
-
00:08:30 in this tutorial about how to use, and how to use is totally the same. So I am first going to
-
00:08:35 select the videos folder. You see, it started from here, and I have example videos inside, example
-
00:08:41 face video. This is automatically downloaded for you with my script, but you can use your videos,
-
00:08:48 of course. So how you can use your own videos, put them into your synchronization folder,
-
00:08:54 then when you click this "select videos" folder from here, and when you go to the top like this
-
00:09:01 and go to the Thin Drives here and go to inside your synchronization folder, your video files
-
00:09:08 will appear here. So you can select here to list all the available videos inside that folder. When
-
00:09:15 you select the folder, it will scan the folder and refresh the videos content. Currently, it is,
-
00:09:23 I think, still scanning. Let's see. Okay, it is trying to find whether there are any
-
00:09:29 videos inside that folder. Yes, it found one file there. So let's return back to our examples
-
00:09:37 which are inside. Let's go to the directory here. Okay, let's go to the home directory,
-
00:09:45 Ubuntu. This is where we are. It may be a little bit confusing in the first time when you are using
-
00:09:51 inside Desktop inside Rope_V4 inside example face video and okay, and you see it's scanned the
-
00:09:58 folders. Then let's select the faces folder. So let's just click the faces folder selection,
-
00:10:03 and you see, same folder selected. This is where my files are, so I'm just going to okay,
-
00:10:09 and it will list me all the example faces as well. Let's select the "Test Video.mp4" file and
-
00:10:16 let's click the "Find Faces". Let's select this face, then which faces I will use in the Windows
-
00:10:23 tutorial I have shown how to use just a single face. So let's just select the first face. Okay,
-
00:10:29 it is selected, then we need to click "Swap Faces" and just wait for this face to be updated
-
00:10:36 first. When you are waiting for an update, do not click anything else, just wait for the operation
-
00:10:41 to completed. Unfortunately, the interface is not displaying the status. Yes, you see, it is
-
00:10:48 changed. Then let's select the swapper resolution. Okay, it is applied. You see, it is significantly
-
00:10:54 improved. Then let's also use the restorer. I use GPEN512; this is the best. Original.
-
00:11:00 Let's enable it from here. The interface is not working as good as on Windows, but it is working.
-
00:11:06 Yes, you see it is applied. However, it may be too strong, so let's make it 30 percent. And yes,
-
00:11:13 it is better. I also use strength, and I make this 20. I explained all of this in the Windows
-
00:11:19 tutorial. Let's make the strength like 120. Once you change the numbers, hit enter. Let's
-
00:11:26 also enable Occluder, Face parser to fix the mouth. So, I will make the mouth 1 like this, and yes,
-
00:11:35 it is all ready for this character. You see, as I move, it will get updated. You can also
-
00:11:42 select multiple faces; it will average them. So, let's say I select this face like this,
-
00:11:48 and then I am going to select this face like this. So, it is going to use both of these
-
00:11:53 faces' averages. The mouth is still not looking very good, so let's make the mouth 10, and it
-
00:11:59 should fix it after we hit enter. Yes, you see, you need to hit enter so the slider will change;
-
00:12:07 until that time, it won't work. Okay, 1 is working perfectly. Then let's also fix the face
-
00:12:13 for this character as well. Let's select it from here. Okay, after we selected it, you see it will
-
00:12:18 become red. Just wait because ThinLinc client is a little delayed. Then which one replaces it
-
00:12:25 with this person? Okay, let's just wait, and then let's also average with this face. So, I am going
-
00:12:32 to use these two faces. To select more than one face, keep pressing the control key, so it will
-
00:12:38 allow you to select multiple faces. Okay, let's see, yes, both faces are now selected. There is
-
00:12:46 a little bit of delay when you are using with the ThinLinc client, but it is working fine. And yes,
-
00:12:52 everything is set. So, how are we going to save it? Let's go to the very beginning or click here,
-
00:12:58 and we need to select the output folder. I am going to output it into my synchronization
-
00:13:03 folder so that I can immediately download it from my own computer. Let's go to the thin drives,
-
00:13:10 mass compute, and okay, and that's it. We did set everything. Now on Massed Compute
-
00:13:17 we have a huge amount of VRAM. You see, I used the nvitop command, and it is displaying
-
00:13:24 VRAM usage. It is only using 4 gigabytes right now; therefore, I am going to increase
-
00:13:29 this thread count to 20, so it will process 20 frames at a time. Then let me show you the real-time
-
00:13:35 speed of this and the VRAM usage. It is just mind-blowingly fast. There is no such application
-
00:13:41 fast as this one. So, click record from here, and click play, and then let's return back to here,
-
00:13:47 and let's watch it. It is going to use over 30 gigabytes VRAM, and let's see the speed once
-
00:13:54 it starts. Yes, just look at this speed. This is the real-time speed, real-time processing
-
00:13:59 speed. You see the speed; it is just mind-blowing. It is already over 30 frames. It is processing;
-
00:14:05 this is real-time speed. It is using over 30 gigabytes VRAM. So, with the Massed Compute,
-
00:14:11 only 31 cents per hour, we are able to use 20 threads. This is the demo video that I have shown
-
00:14:19 at the beginning. So, you see, this is how we use Massed Compute; it is just mind-blowingly fast,
-
00:14:25 and it is also super cheap. If you use RunPod, it will be much more pricey. It is 69 cents on RunPod
-
00:14:33 for the same GPU. Moreover, on RunPod, there is no such desktop virtual machine. We did set up this
-
00:14:41 virtual machine so that this application will work perfectly. We did install the necessary libraries,
-
00:14:47 necessary drivers. Moreover, if you are a Linux user and you are using Linux Ubuntu on your own
-
00:14:55 PC, then you can use this script exactly there. Just make sure that you have installed CUDA 11.8.
-
00:15:03 What I mean by that, let's open a new window. This is just for local users, not the users
-
00:15:07 that are going to use Massed Compute. nvcc --version So, you should get CUDA 11.8. And
-
00:15:17 when you type Python 3, you should get 3.10.12. If you have installed Python, not Python 3, you can
-
00:15:24 modify my installer script and then just use the installer as it is. It should work. Okay, we are
-
00:15:32 almost done. Okay, video is rendered and saved, but I noticed two errors. You see, even though
-
00:15:38 we have written 30 here, the slider is not changed because we couldn't hit the enter accurately. When
-
00:15:44 you hit enter, you need to see the slider changed; you see the face change; so, it wasn't accurate
-
00:15:49 rendering. And also, this was also not changed, so I hit enter, and you see the slider changed,
-
00:15:57 and I hit enter; you see, slider changed. You need to be careful with the enter keyboard and
-
00:16:02 make sure that it is working. I'm going to take another render, then I will show you the result,
-
00:16:09 and we will end the tutorial. Okay, I click play. So, you first click the record, then you
-
00:16:16 click the play to make it played. If you want to just replace an image, you use this image tab.
-
00:16:22 I have shown how to use it in the Windows tutorial. You really should watch the Windows
-
00:16:27 tutorial because a lot of information is explained in this tutorial. Okay, new video rendering is
-
00:16:34 also completed. Let's go to our synchronization folder. This is on my computer, you see. Then
-
00:16:41 let's double click and see the video. Yes, it is working amazing. It is synchronized with my
-
00:16:49 computer, so I can use it. Moreover, my installer script is also installing a video file player,
-
00:16:56 so you can also use the Massed Compute to watch the videos. Let's go to the synchronization folder
-
00:17:04 inside home, inside thin drives, Mass Compute, and in here, you can just double click the video
-
00:17:11 files. By the way, not the temporary files, but the full files, and you will be able to play the
-
00:17:17 video inside the Massed Compute as well. I hope you have enjoyed. Please also consider supporting
-
00:17:23 the original author of the Rope. In the right bottom of the application you will see, "Enjoy Rope,
-
00:17:29 please support PayPal." When you click that link, you will get to this page. Please also consider
-
00:17:34 supporting the original author of the Rope Hillobar over so that he can make better applications.
-
00:17:41 If you have any questions, just message me from Patreon or from this video. So, this will run on
-
00:17:47 the remote computer. You don't even need to have a GPU to run this, just the computer where you can
-
00:17:52 install the ThinLinc client. It can be Mac, Linux, Windows, whatever, and then use it to connect to
-
00:17:59 the remote Massed Compute cloud server. Before you terminate your Massed Compute instance, make sure
-
00:18:07 that you have downloaded every file because once you terminate, all the data will be permanently
-
00:18:13 deleted. You won't be able to recover them. You see, selecting terminate will delete all data on
-
00:18:19 this VM, virtual machine, and recycle the machine. So, make sure that you have saved everything,
-
00:18:25 then just terminate, and that's it. Hopefully, see you in another more amazing tutorial. More
-
00:18:31 amazing tutorials are coming. We have Patreon, post index on the Patreon, on the GitHub,
-
00:18:37 and we have so many amazing applications. I have also tutorials for them on the channel,
-
00:18:43 so you can ask me the question, and I can forward you to the accurate script, tutorial,
-
00:18:51 the post. Hopefully, see you in another amazing tutorial. And please, also one more thing,
-
00:18:56 please also Star our repository, you see. We are at 1.8k, 1800 Stars, also Fork it and Watch it.
-
00:19:06 I appreciate that. You can also Sponsor me. Also, don't forget to join our Discord channel. You see,
-
00:19:13 this is our Discord channel. When you click it, you will get to this page, and we have
-
00:19:17 over 7,000 members, over 1,000 online members, so join and talk with us. This is free; you
-
00:19:24 don't need to be my Patreon supporter. Just join the Discord and talk with the community and me.