SUPIR New SOTA Open Source Image Upscaler and Enhancer Model Better Than Magnific and Topaz AI Tutorial
SUPIR: New SOTA Open Source Image Upscaler & Enhancer Model Better Than Magnific & Topaz AI Tutorial
Full tutorial link > https://www.youtube.com/watch?v=PqREA6-bC3w


With V8, NOW WORKS on 12 GB GPUs as well with Juggernaut-XL-v9 base model. In this tutorial video, I introduce SUPIR (Scaling-UP Image Restoration), a state-of-the-art image enhancing and upscaling model presented in the paper "Scaling Up to Excellence: Practicing Model Scaling for Photo-Realistic Image Restoration In the Wild." SUPIR surpasses the performance of expensive alternatives like Magnific AI or Topaz AI and is open-source, with the models readily available. Additionally, I provide a one-click installer for easy installation and use on various platforms, including Windows, RunPod, and Linux. SUPIR also incorporates the Stable Diffusion XL (SDXL) pipeline for superior photo upscaling and enhancement.
#SUPIR #StableDiffusion #SDXL
The Patreon Post Link Used In The Video To Download Installers
https://www.patreon.com/posts/99176057
Official GitHub Link
https://github.com/Fanghua-Yu/SUPIR
Our Discord Channel
https://discord.com/servers/software-engineering-courses-secourses-772774097734074388
Our Patreon With Amazing AI Scripts & Tutorials
https://www.patreon.com/SECourses
00:00:00 Introduction to SUPIR (Scaling-UP Image Restoration) full tutorial
00:02:10 How to download and install SUPIR on Windows or RunPod (thus Linux)
00:03:19 How to setup a community Pod on RunPod's newest interface
00:04:33 How to install and start SUPIR on RunPod
00:07:10 How to use Proxy connect of RunPod
00:08:13 How to install and start our own quantization supporting LLaVA
00:09:22 Getting image description from our own LLaVA model
00:09:42 How to use SUPIR interface and testing camel image (test image 1) on SUPIR in details
00:12:07 Testing a very old family photo enhancement and upscaling with SUPIR (test image 2)
00:14:34 Where the generated images are saved
00:14:53 Testing the image of Arnold Schwarzenegger as a warrior (test image 3) on SUPIR in details
00:16:22 The effect of simple prompt vs detailed prompt
00:17:30 Testing a dragon statue enhancement and upscaling with SUPIR (test image 4)
00:17:42 How I used ChatGPT Plus / GPT-4 for image captioning
00:18:29 The model works with literally every resolution and example very big upscale
00:19:00 Testing image of a dinosaur in jurassic park image enhancement and upscaling with SUPIR (test image 5)
00:19:41 From 500px to 3000px upscale results and how to do very big upscale properly
00:22:39 GPU utilization of the SUPIR scripts
00:23:15 If you get out of VRAM error what can you do and how you can solve
00:25:22 Testing a MonsterMMORPG Game character (anime like drawing) upscaling and image enhancing (test image 6)
00:25:39 What to do if your image has transparent pixels to be able to upscale
00:27:35 Testing a black and white colored movie screenshot of a man image enhancement and upscaling with SUPIR (test image 7)
00:28:29 Testing a screenshot from the movie Predator enhancement and upscaling with SUPIR (test image 8)
00:29:12 The queue ability of the Gradio app of SUPIR
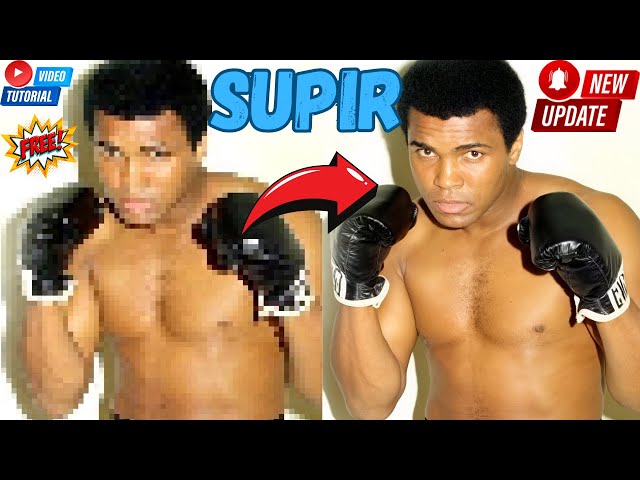
00:29:49 Testing an old photo of Muhammad Ali in a boxing stance image enhancement and upscaling with SUPIR (test image 9)
00:30:45 Testing a black and white colored movie screenshot of Charlie Chaplin image enhancement and upscaling with SUPIR (test image 10)
Info From The Paper
Sure, here's a summary of the paper "Scaling Up to Excellence: Practicing Model Scaling for Photo-Realistic Image Restoration In the Wild" (SUPIR), with the goal of at least 3,000 characters.
The paper introduces SUPIR, a groundbreaking image restoration (IR) approach that combines a powerful generative prior with the benefits of model scaling. SUPIR leverages multi-modal techniques and a large-scale generative prior, making significant strides towards intelligent and realistic image restoration. The authors demonstrate SUPIR's superiority in various IR tasks, achieving exceptional visual quality. A key innovation is the model scaling technique, offering dramatic improvements in capabilities and pushing the boundaries of image restoration. Additionally, the model offers the unique ability to be controlled via text prompts, greatly expanding its applications and potential.
Advanced Generative Prior: SUPIR utilizes StableDiffusion-XL (SDXL), a massive generative model with 2.6 billion parameters. SDXL serves as a powerful tool for introducing high-quality image generation abilities into the image restoration process.
Image Encoder Fine-Tuning: The image encoder is fine-tuned to improve its resilience to image degradations, ensuring robust interpretation of low-quality input images.
Large-Scale Training Dataset: A massive dataset comprising 20 million high-resolution, high-quality images is collected to fully harness the potential of model scaling. Descriptive text annotations accompany each image, enabling text-based control of image restoration.
Multi-modal Language Integration: A 13-billion-parameter multi-modal language model is used to provide descriptive prompts of image content, greatly enhancing the model's ability to understand and restore images accurately.
-
00:00:00 Greetings, everyone. In this video, I am going to introduce you to the SUPIR that is literally
-
00:00:05 the very best image enhancer and upscaler currently available both commercially and
-
00:00:13 open source. This is an open-source model. It is better than Magnific or Topaz AI. And believe me,
-
00:00:20 I am not exaggerating. You won't believe the image upscaling it has. This is their demo page,
-
00:00:27 but I will show you 10 images upscale that I have made myself and you won't be able to believe your
-
00:00:36 eyes. I have developed a one-click installer for this open-source model. This one-click installer
-
00:00:43 supports both RunPod and Windows. So you can use it in either place. It is so easy to use
-
00:00:51 and supports so many features. I have added the very best features that you need. And the image
-
00:00:58 upscaling capability is just mind-blowing. This is my test as you see on the left original image
-
00:01:05 on the right upscaled image. This is just another test that I have made. This is the original input
-
00:01:12 image and this is the upscaled image. Can you believe the difference? So watch this video
-
00:01:18 entirely to learn how to use this amazing new model and upscale your images yourself locally on
-
00:01:29 RunPod or on your computer. Don't pay any money to those expensive services such as Magnific or Topaz
-
00:01:38 AI. This is all for free and you won't believe the quality of this model. It is just mind-blowing,
-
00:01:45 believe me. Believe me that this model is the very best upscaler and enhancer available
-
00:01:50 right now. It is also using SDXL pipeline. It is utilizing the SDXL and you will learn everything
-
00:01:58 about this amazing model in this video. So I have prepared a very detailed post about how
-
00:02:04 to download and install the SUPIR installers for Windows or RunPod or Linux. Everything
-
00:02:11 that you need is detailedly explained in this post and the link of this post will
-
00:02:17 be in the description of the video. Currently, the SUPIR requires over 30 GB VRAM. Therefore,
-
00:02:23 I am going to show you how to install and use on RunPod. So let's download the latest version from
-
00:02:30 here. But I suggest you go to the very bottom of the post and you will see the attachments
-
00:02:35 here. So downloading from attachments is always better. Let's download it from here. Let's go to
-
00:02:40 downloads, extract it into any folder where you want to install. For example, I will extract it
-
00:02:47 into my R drive like this. Then enter inside the extracted folder. For installing Windows,
-
00:02:53 just double-click and run the Windows install dot bat file. It will automatically install everything
-
00:02:59 and download the models automatically for you. Let's also start installing on RunPod because
-
00:03:04 on my RTX 3090 I am not able to run it for now. I am hoping that there will be improvements for
-
00:03:12 reducing the VRAM. So I will use this link to log in to my account. If you also use this link,
-
00:03:16 I appreciate that. Let's log in. So this is the newest interface of the RunPod. Let's go to the
-
00:03:21 pods. Click GPU pod. From here, I will use the community cloud. Let's select extreme speed and
-
00:03:28 I will use A6000 GPU. This GPU has 48 GB VRAM and only 69 cents per hour. It is amazing. So I will
-
00:03:39 use the PyTorch but you can pretty much use any template you want. I will use this template. Let's
-
00:03:44 customize and let's make this 70 GB. Let's also expose 7861 port so we can connect with the proxy
-
00:03:54 but Gradio has a bug. I don't know if it is fixed or not. Then let's click continue. Let's click
-
00:03:58 deploy. Let's go to my pods and wait until the connect button appears. For Windows installation,
-
00:04:05 you don't need to do anything. It will do everything automatically for you. However,
-
00:04:09 you need a good GPU right now and hopefully, I will update this post when it becomes available
-
00:04:15 for 24 GB GPUs or 16 GB GPUs or 12 GB GPUs. I am searching for how to reduce VRAM usage. I
-
00:04:23 am pretty sure it is doable. But for now, we will use A6000 GPU. Okay, the template is started. Now
-
00:04:31 connect, connect to JupyterLab. The instructions for RunPod are also shared in this post. So let's
-
00:04:38 open it. All we need to do is drag and drop the installer files here. I dragged and dropped
-
00:04:45 everything. It is easier. Open a new terminal. From the installation instructions, copy this,
-
00:04:51 paste it into the terminal and just wait. It will do everything automatically for you. This is the
-
00:04:56 usual workflow for all of my newest scripts. So you can use all my newest scripts with this way.
-
00:05:04 So let me show you another example. Let's go to our Patreon exclusive post index. And in here,
-
00:05:10 let's go to the SOTA image captioning scripts. You will see that we have CogVML, Kosmos 2,
-
00:05:17 LLaVA, BLIP 2, Qwen-VL, and many other captionings shared here. When you download their zip files,
-
00:05:26 you will see the same way RunPod instructions and Windows instructions. Windows instructions are so
-
00:05:32 simple. Just double-click run and it will install everything. Okay, SUPIR is getting installed on
-
00:05:37 our RunPod right now. We just need to wait for it to complete installation and download the models.
-
00:05:43 All of my scripts generate their own virtual environment. Therefore, they will not conflict
-
00:05:50 with any of your other installations. Also, make sure that you install them into separate folders,
-
00:05:56 not in the same folder to not have conflicting virtual environments. With my scripts, I also
-
00:06:02 include PIP freeze information. Therefore, if one library gets broken, you can just look at the PIP
-
00:06:09 freeze information and find out which library update has broken it. Moreover, just message me
-
00:06:16 from Patreon and I will fix my script as soon as possible. Therefore, supporting me on Patreon is
-
00:06:23 really useful and helpful for you as well. All right, so the installation has been completed.
-
00:06:28 You can see that everything is installed properly and the models are downloaded. Now let's return
-
00:06:34 to the RunPod instructions and copy this part. Open a new terminal and paste it and hit enter.
-
00:06:41 And this will start the SUPIR advanced Gradio Interface for us automatically. You will also
-
00:06:46 get these messages. Don't worry, it is working perfectly fine. When you first time run it,
-
00:06:53 it will also download some additional model files. Also, initial loading may be slower because of the
-
00:07:00 RunPod disk or caching into the disk. You will also get this message. Don't worry, this is not
-
00:07:05 an error. It will work. And finally, everything loaded. We see that it is running on a local URL
-
00:07:11 and also a public URL. Let's first test the proxy connect. I wonder if the Gradio bug is fixed or
-
00:07:18 not. I have reported the bug that Gradio has that prevented connection from the proxy. Okay,
-
00:07:25 Gradio proxy connection bug is still not fixed. I reported this. So we will continue using with
-
00:07:31 Gradio Live. Let's start it. Once that bug is fixed, you can use the proxy connection. But
-
00:07:38 Gradio Live is working perfectly. And we got our interface loaded. This is an advanced interface
-
00:07:44 than what the authors shared. So let's load our images. I have downloaded and prepared some
-
00:07:52 images for this video. So let's begin with this camel. The authors also added the LLaVA. However,
-
00:08:00 when you also run the LLaVA, you need more than 80 GB GPU. Therefore, what I am going to do is I
-
00:08:07 will either define a prompt myself or I will use the LLaVA of myself. Because my LLaVA supports
-
00:08:15 4-bit and 8-bit loading as well. Let me show you. The installation and everything is the same. And
-
00:08:22 our LLaVA is here. Let's start it on my computer right now. So run part 1, run part 2, and run part
-
00:08:30 3. You see, my quantization reduces the VRAM usage significantly. This screen started, but
-
00:08:39 it won't work yet because we have to also start the model pipeline. So I will load a 13 billion
-
00:08:47 model with 8-bit. Let's go with option five. You see, my scripts are also installing Triton,
-
00:08:55 bitsandbytes, acceleration, deepspeed, everything which are not easy to install on Windows. However,
-
00:09:03 my scripts are doing that with precompiled wheels. Therefore, my scripts are supporting quantized
-
00:09:09 model loadings as well, like 4-bit quantization. Okay, the model is loaded. Now when I refresh this
-
00:09:17 page, I will see that the running LLaVA model here. Okay, it is started. Let's load the same
-
00:09:24 picture and hit send. So it will caption the image and give me the results. Okay, it started to give
-
00:09:32 me a caption. A camel is standing in a desert with its heads up and its legs spread apart. All right,
-
00:09:39 let's copy this message. Let's go back to SUPIR interface and paste as a prompt. Now there are 2
-
00:09:46 stages. The stage 1 will generate an image like this. Let me show you. So this is the stage 1
-
00:09:53 output. However, the main stage is stage 2. Let's run it. There are also several other options that
-
00:10:00 I haven't tested in details yet. For example, Linear CGF, Linear Stage2 Guidance. I find that
-
00:10:08 Linear Stage2 Guidance is improving the quality. Moreover, I have added the number of images
-
00:10:15 to generate. Upscale option there is. I added randomize seed. All of the images will be saved in
-
00:10:21 the outputs folder and we are getting the image. So to compare both of these images, I am going to
-
00:10:28 use this a very good image comparison website ImageSLI.com. So this site. So let's download
-
00:10:37 both of the images. Let's click this icon. It will download the image for us and this one. And then
-
00:10:43 let's click new album. You don't have to share them publicly. But this site is working great. So
-
00:10:49 this is the first image. This is the second image. And let's upload. And we got the images. So I will
-
00:10:54 make a full screen. On the left side, you see that the original image used and on the right side, you
-
00:11:02 see the new generated image and the difference is significant. From this image into this image. Are
-
00:11:11 there any mistakes? Yes, there are some mistakes that I can notice. But this is just mind-blowing
-
00:11:17 improvement from this image to this image. The resolution of the generated image is let me show
-
00:11:23 you it is one 1376 to 1024. And the original image resolution is 500 to 375. Let's try with upscale
-
00:11:35 3 times and let's click stage 2 run. This will be still working with 48GB. Let me show you how much
-
00:11:43 VRAM it is using. nvidia-smi and currently we are using 34 gigabytes VRAM. It started working
-
00:11:52 and the image is generated. Let's see the new resolution. Okay, now we are 1504 to 1120 pixels
-
00:12:02 resolution and it is looking amazing quality. Okay, this time I am going to use this family
-
00:12:08 photo. This is a very low-quality family photo. Let's also caption it with our LLaVA. So you see
-
00:12:15 the LLaVA is generating a pretty descriptive and detailed captioning. You can also use free
-
00:12:22 services like Google Bard free or other vision models. Okay, let's copy the caption and let's
-
00:12:29 paste it as a prompt here. Let's also make this as upscale 3 times. There is also a number of steps.
-
00:12:36 Maybe let's try 80 times or 100 times steps this time. So you can play with all of these values and
-
00:12:44 stage 2 run. This time for comparing. I will use another website. All of the links are here. Let's
-
00:12:50 use this one this time for comparing. I also made it to show the progress here. So let's say if you
-
00:12:57 generate 100 images, you will be able to see the progress. Moreover, you can also track the CMD,
-
00:13:04 the command line interface, as you are seeing right now. For default resolution, it took only
-
00:13:10 27 seconds to upscale an image. And this is just amazing speed. And for 3X, it only took 31. And
-
00:13:19 for this one, it took 53 seconds. Why? Because we used 100 steps and we got our image. So let's
-
00:13:27 download both of the images and compare them. So let's compare the images. I downloaded them
-
00:13:32 and let's hit compare. And let's make this full screen. Okay, on the left, we see the original
-
00:13:39 image. You see how it is. It is looking like this, a terrible quality, a very low-quality image. And
-
00:13:46 on the right, we see the upscaled image. As you can see from this left image, it generated this
-
00:13:53 right image. It is just amazing. Mind-blowing. I can say that this is the ultimate, the very best
-
00:14:02 upscale5 right now available both commercially and open source. This is better than Magnific AI. Only
-
00:14:10 in the eyes, we can see some not natural look. But other than that, it is just mind-blowing.
-
00:14:18 Amazing. You can never get such quality with other upscalers as far as I know right now. And it is
-
00:14:24 just mind-blowing. Now I am going to repeat these steps for other images and show you the
-
00:14:31 results of each image. Keep following. Let me also show you where the outputs are saved. Inside the
-
00:14:38 SUPIR directory, you will find outputs directory. This is where all the images will be automatically
-
00:14:45 saved. So you can right-click and download them. You can use RunPodCTL to download. With
-
00:14:50 any way you can download. This is where all of the outputs will be by default saved. In this image,
-
00:14:56 I have done 3 separate testing. The first one is 100 steps upscale 3 times and other settings
-
00:15:03 are default. So let's first compare that way. And here the comparison. From left image to
-
00:15:12 the right image. Can you see the difference? It is just mind-blowing. This model can be
-
00:15:20 used to upscale movies with like a never seen before quality. However, it would cost a lot of
-
00:15:28 computation power. But this is just mind-blowing. Can you believe it? I also have tested the Linear
-
00:15:35 Stage 2 Guidance effect. So let's also see the difference of linear stage 2 guidance effect
-
00:15:41 with 0.5 guidance start. On the right one, we have the default image and on the left one,
-
00:15:48 we have the linear guidance step effect. There aren't that much difference as you can see. There
-
00:15:56 are some minor changes. For example, here you see this is getting changed from this to this. I think
-
00:16:03 linear guidance scale adding some more details, some more realism. So it is up to you to test the
-
00:16:12 effect of each one and see which one is performing better. By the way, the upscale is just amazing.
-
00:16:19 The amount of resolution we get is just amazing. And as a third step, I used a simple description,
-
00:16:27 "A muscular warrior man holding a big sword in front of a cave wall." So let's also see
-
00:16:33 the effect of this description versus a very detailed description of the LLaVA. Moreover, there
-
00:16:39 are always default positive prompt and default negative prompt. So these are also always used.
-
00:16:46 Remember that. Okay. Now on the left, we have our default prompt, a simple prompt, and on the right,
-
00:16:54 we have the detailed LLaVA prompt. As you can see, it made a very minor difference. So the
-
00:16:59 prompt does not matter that much. It matters. You see, on the skin tone, there is a difference from
-
00:17:05 this to this. So it makes some difference, but it doesn't make a major difference. So you don't
-
00:17:11 need the LLaVA to use this model. But if you use the LLaVA or any other detailed image captioner,
-
00:17:18 you may get a better result. So it is best to also use some image captioner to improve the details of
-
00:17:25 the image. But the results are amazing either way. The dragon image upscale is also ready. For this
-
00:17:32 image, I have used the ChatGPT image captioning. You see, this is my prompt. "Describe this image
-
00:17:40 like a BLIP captioning model," and the results are astonishing. So let's look at the results.
-
00:17:46 And here we see the results. As you can see, the difference is just mind-blowing from left
-
00:17:55 image to the right image, the difference, the details, the upscale, everything that the model
-
00:18:04 adds is just magnificent as you can see. This model is just mind-blowing. You can turn your
-
00:18:11 low-resolution images into very high-resolution images with this model for free on your computer,
-
00:18:19 on RunPod, wherever you want. This runs locally. The images are kept, and the difference is huge.
-
00:18:26 One another amazing feature of this model is that it works literally with every resolution input.
-
00:18:33 For example, this image from 665 to 847 upscaled into 1984 to 2525 pixels with 3X upscale. And you
-
00:18:49 can even set as 8 times upscale as well. You may be wondering how much VRAM this one used. Let's
-
00:18:56 check it out. So it uses 45 gigabytes VRAM. I think we can go a little bit more higher
-
00:19:03 resolution. All right, the dinosaur image is ready. On this image, I tried six times upscale.
-
00:19:11 This was a huge upscale at a single round. So from this image, as you can see, we got this
-
00:19:19 image. This is a super improvement. There are some mistakes in the image. I can notice that. However,
-
00:19:29 this could be due to that we have upscaled at a single round from 1 time to 6 times. So this
-
00:19:37 image has become from 500 to 281 to 3008 to 1696. What we can do, we can multiple times upscale this
-
00:19:53 image. And let's also do that way and see if we will get those some mistakes or not this time. So
-
00:20:02 I will do several times upscale. My strategy will be upscale 1 time, then use the upscaled image
-
00:20:09 and upscale another time. And let's see if there will be a significant difference or not with the
-
00:20:15 same settings. So I am setting the settings. One another thing is when you are uploading a file to
-
00:20:22 Gradio live, make sure that the file is uploaded before hitting the button for doing captioning,
-
00:20:29 doing upscaling or another thing. This is super important. Because when you are using Gradio live,
-
00:20:36 upload of files may take time. And this is a common mistake that is being made. So wait
-
00:20:42 until the file is uploaded. Currently this one failed so I will try to reupload. Looks like the
-
00:20:48 Gradio interface is frozen so I will try again. Ok this time worked. Such errors may always happen.
-
00:20:56 So be ready for such errors. Ok let's do the first upscale then I will do the several more
-
00:21:03 upscales and I will show you the results. Ok the first upscale has been completed.
-
00:21:08 Now I will re-feed the new upscaled image and upscale 1 more time. So lets see this strategy
-
00:21:15 will yield better results or not. Every time it will generate one first image like this, then the
-
00:21:21 second image like this. Do not get confused with the first image that it generates. The
-
00:21:27 second image is the accurate one. Make sure that you are loading and using that image. Currently,
-
00:21:33 Gradio is also another time broken. I think this is because of the Gradio live shared. This can
-
00:21:39 happen. And I was uploading. So this is the first image it displays in the output. And this is the
-
00:21:45 second image it displays in the output. When we do the one-time upscale, I don't see those erroneous
-
00:21:52 output in the hands, for example, or in the leg. Now it is time to do the second-time upscale. The
-
00:21:58 second upscale didn't increase the resolution. So therefore, it looks like we have to increase
-
00:22:06 the upscale ratio mandatorily. So I am going to run another time. I don't know how this is
-
00:22:14 working exactly with resolutions, but the second upscale didn't increase the resolution. Therefore,
-
00:22:20 we didn't get extra details. So on the left, we see the second upscale. On the right, we see the
-
00:22:26 first upscale result. It made this image into this 1 with one-time upscale. Therefore, now I am going
-
00:22:34 to try with upscale 2 and see the result. This is how the RunPod screen is displaying the memory
-
00:22:42 usage and the GPU utilization. You see, we are using the entire GPU memory of the A6000 GPU and
-
00:22:51 the GPU utilization is 100 percent. So the script is working very well, running very effectively.
-
00:22:58 Only it is using too much VRAM. However, this VRAM can be reduced with model offloading and other
-
00:23:04 optimizations. And hopefully, I will research for them as well. And this time the upscale failed
-
00:23:11 because it looks like the resolution that we have provided was too big. So what can we do in this
-
00:23:18 case? We can get a better GPU or we can slightly reduce the input image dimension. For example,
-
00:23:26 I will make it like this and try again. Probably this will fix. Let's look at our VRAM usage. Yes,
-
00:23:35 still we are using a lot of VRAM. So let's change the image and try again with a lower resolution.
-
00:23:42 Okay, this time we got the output. Let's see the resolution of the image. Yes, it got bigger
-
00:23:49 slightly and I don't see those errors. And here we got the comparison on the left side. We have
-
00:23:55 got 2 times upscale and on the right side, we have got 6 times upscale. 6 times upscale, of course,
-
00:24:03 have a higher resolution, but 2 times upscale is not that high resolution. However, on the 2 times
-
00:24:11 upscale, we don't have those errors. You see on the hands of the claws of the dinosaur. There are
-
00:24:18 no mistakes, but on the 6 times upscale at 1 time we have errors. Therefore, the best strategy would
-
00:24:25 have been getting a higher VRAM GPU and doing 2 times upscale, 1 time upscale, then upscale
-
00:24:33 2 times. However, still in each case, the results are astonishing when we consider the initial image
-
00:24:41 input. This is just astonishing. Perhaps we could upscale 4 times initially and do not get these
-
00:24:48 errors in the claws. So it is totally up to us. Actually, I will just test it for you. And here we
-
00:24:54 now see the 4x upscale versus 6x upscale. The 4x upscale definitely has a lesser degree of errors.
-
00:25:06 However, the quality is also not as good as 6x upscale, as you can see, but still an amazing
-
00:25:15 improvement over the initial image. You understand the logic to fix the such errors. This time I am
-
00:25:23 going to upscale this monster image from the game that I am developing, MonsterMMORPG.com.
-
00:25:29 It's a free MMORPG game. And what is special about this image? This is the highest resolution of the
-
00:25:36 image that I have. And what is special about this image that it has a transparent background. Since
-
00:25:44 Stable Diffusion doesn't have transparency, I have to add a background to this image to be
-
00:25:52 able to upscale it. Therefore, I am going to add a background to this image right now. I am going to
-
00:25:58 add a background like this, and then I will merge it like this, then save it for upscaling. Okay,
-
00:26:05 I merged and I saved. I will name it as fixed, then I will upscale as usual. For this image, I
-
00:26:12 have used this description, 100 steps, 2x upscale, and Linear Stage 2 Guidance like this. Now time to
-
00:26:21 see the comparison. And here we see the comparison of the upscaled image. Let's look at the details
-
00:26:29 and see if there are any errors, mistakes. and I can say that the upscale worked amazingly. I
-
00:26:39 can see it added huge details. Let's see full screen. So the original image is looking like
-
00:26:46 this in full resolution of my screen. And here the upscaled version. It added so much details,
-
00:26:53 so good. There are just minor detail loss in some cases, but just minor. I don't see any
-
00:27:00 major mistake in the image upscale. This is just mind-blowing. I can say you that this is
-
00:27:07 just mind-blowing. I could never get such quality upscale with other open source, previously known
-
00:27:16 best workflows like Ultimate Upscale. However, this is working amazingly, just mind-blowing as
-
00:27:23 you are seeing right now. And this upscaler works on real images, also drawing images, 3D images,
-
00:27:31 literally everything. This time I have tested this image. This is a black and white image,
-
00:27:36 an old image. This is the description, the prompt that I used for the image, 100 steps,
-
00:27:42 0.5 linear stage 2 guidance. And now let's see the results of the image. All right. We got some
-
00:27:50 amazing results. From this image, into this image and it didn't take longer than 60 seconds. This
-
00:27:59 is just mind-blowing quality difference. You see, it is very, very loyal to the original
-
00:28:07 image and still restoring the image, upscaling it, enhancing it. This is just next level. This
-
00:28:14 model is just mind-blowing, just next level very much. So this model is the very best available
-
00:28:21 model right now. And with my one-click installer, you can use it as many times as you want. Okay,
-
00:28:27 we got the next image results. This is the description, the prompt that I have used. I have
-
00:28:33 used a 2x upscale, steps, linear stage 2 guidance. Now let's compare the images. Okay, on the left,
-
00:28:40 we see the original image as usual. You see, this is the resolution of the image. And on the right,
-
00:28:46 we see the upscaled image. It added some certain degree of details, but it didn't work as good as
-
00:28:55 in some other images. However, still, it is very, very magnificent, very high quality. We got some
-
00:29:03 real improvements. It is still really loyal to the original image, original composition. The Gradio
-
00:29:12 interface also supporting a queue system. So you can click multiple images to run at the same time,
-
00:29:20 and they will get queued automatically. So you can open multiple pages and just click hit upscale,
-
00:29:28 and they will get queued. Let me demonstrate to you live. So this image is running right now. I
-
00:29:33 am opening another page, just select something and just hit stage 2. And you will see that it
-
00:29:39 is in the queue as you are seeing right now. So this Gradio interface is really, really advanced
-
00:29:46 one. And we got another image upscaled here. It is just looking magnificent. This is the description
-
00:29:53 that I have used. Let's compare the results. Okay. On the left, we got the original image and on the
-
00:30:01 right, we got the upscaled image. Can you believe this improvement? This is just next level, almost
-
00:30:09 perfect and amazing, just amazing quality increase from left to right. This is better than Magnific.
-
00:30:18 This is better than Topaz AI. This is the very best model, very best upscaler. I can say you
-
00:30:25 that with being respectful, loyal to the original image. This is not adding something hallucinating.
-
00:30:34 This is being kept loyal to the original image. Look at the shadows, everything, everything is
-
00:30:41 just perfect. And this is our final example image. This was also another black and white image. This
-
00:30:48 was the caption. I used the same settings. So let's also see the results of this one. Okay. Here
-
00:30:54 we got the results. On the left it is original and on the right it is upscaled. Can you believe this
-
00:31:01 upscale? This is just mind-blowing. From left to right. Wow. This is just wow. This is just super
-
00:31:10 next level. As you can see right now, it is just amazing. It still has some problems as you see,
-
00:31:17 perhaps some better prompting can fix it on the top hat of the picture. However,
-
00:31:24 it is just mind-blowingly accurate and amazing. I can say you that. I hope you have enjoyed. Please
-
00:31:30 subscribe to our channel. We have amazing videos as you are seeing right now. In our videos tab,
-
00:31:36 you can reach them also in the search bar, search anything you wish. For example, if you
-
00:31:42 want to learn RunPod, just search for RunPod and you will get our RunPod videos. I have amazing
-
00:31:48 RunPod videos. If you want to learn how to train Stable Diffusion, search for such as DremBooth and
-
00:31:54 you will see our amazing DremBooth videos. So search anything that you wish. Also, check out
-
00:32:01 our playlists. We have amazing playlist videos. I also have full tutorials. Please also join
-
00:32:08 our Discord channel. The link is here. We have so many amazing people in our Discord channel.
-
00:32:14 We have over 6000 members, 1000 online. We are very active. I am very active on the Discord so
-
00:32:21 you can follow me everywhere on LinkedIn, on Twitter. Also, please subscribe to our
-
00:32:27 Patreon and support my work. Thank you so much for watching. Hopefully, see you in another amazing
-
00:32:32 tutorial video because I have so many, so many new scripts on Patreon, but I still didn't have
-
00:32:39 time to record a video for them. Such as 1-click automatic installer for the InstantId. This is the
-
00:32:47 very best Instant Id that works much better than the Comfy UI or the ControlNet in Automatic1111
-
00:32:54 Web UI. We have new amazing configurations for DreamBooth training. I still didn't have time to
-
00:32:59 record new videos. So follow me and hopefully see you in another amazing tutorial video.